Table of Contents
If you’ve ever tried to migrate a WordPress site and ended up with broken images, missing posts, or hours of manual work – you already know how painful the process can be. The WordPress post export import feature in the Post Export Import with Media plugin solves this problem completely. This guide walks you through every option available: bulk exports, date-range filtering, individual post selection, ACF custom field exports, WPML multilingual support, batch processing configuration, and the full import workflow. Whether you’re moving a small blog or a large WooCommerce store, this documentation covers everything you need to do it right.
What Is WordPress Post Export Import?
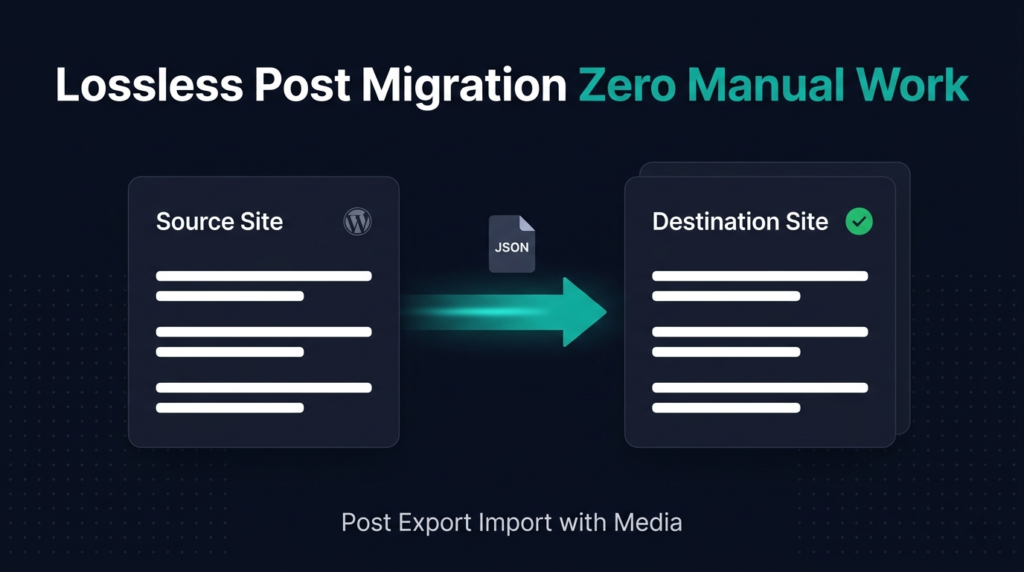
WordPress post export import is the process of packaging your posts, pages, or custom post types from one WordPress site into a portable file – and then loading that file into another WordPress installation. Unlike the default WordPress export tool, which produces an XML file that often loses media attachments and meta data, the Post Export Import with Media plugin exports content to JSON format, preserves all post data, and gives you full control over what gets exported. The plugin organizes everything into two main sections on a single admin page: Post Export & Import and Media Export & Import. This separation keeps your workflow clean while both remain accessible from the same screen. You can learn more about the native WordPress import/export system at the official WordPress developer documentation.
How to Activate WordPress Post Export Import in the Plugin
The post export and import features are active by default – no separate activation step is required. Follow these steps to reach the main plugin page and begin using it:
- Install and activate the plugin – Go to WordPress Dashboard → Plugins → Add New, search for “Post Export Import with Media,” install it, and click Activate.
- Navigate to the plugin page – In your WordPress admin sidebar, find and click the Post Export Import with Media menu item. You will land on the main plugin page.
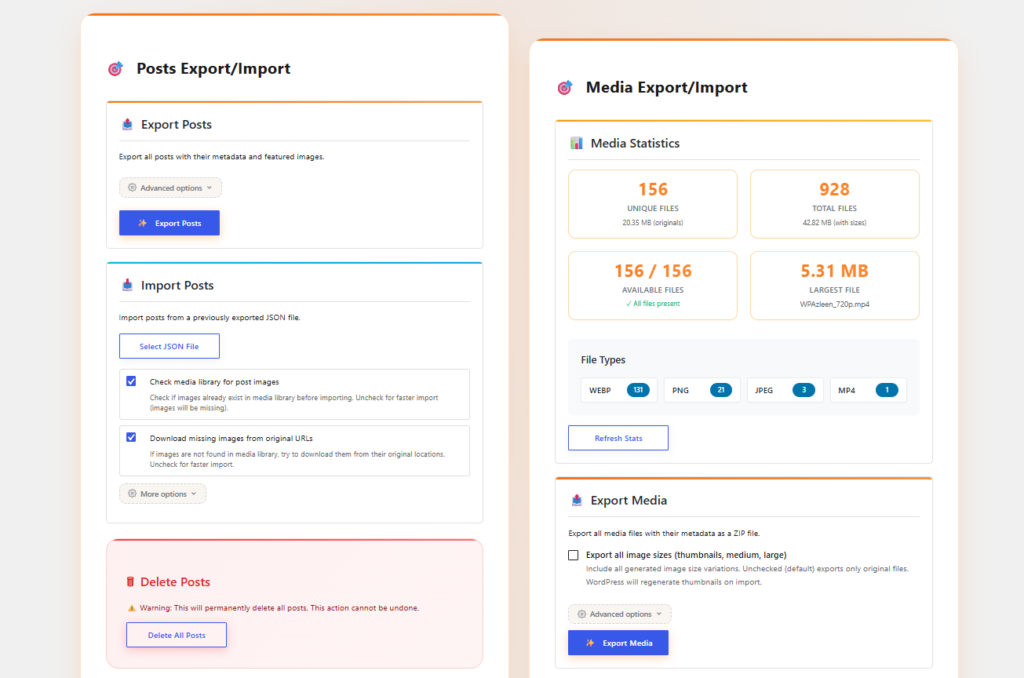
- Review the two main sections – The top portion of the page shows Post Export & Import. Below that, you will find Media Export & Import. The System Test section sits at the bottom and displays server configuration details.
- Check System Test before proceeding – Click the System Test section to expand it and verify your server meets the requirements for smooth exporting and importing.
- Handle media first (recommended) – Before exporting posts, export or import your media files first. Alternatively, use the plugin’s option to download media directly from the source site during import – covered in the Media section of this documentation.
How to Use WordPress Post Export Import: Step-by-Step Guide
Step 1: Run a Simple Bulk Post Export
The quickest way to use WordPress post export import is the one-click bulk export. In the Post Export section, click the Export Posts button. The plugin immediately begins processing and redirects you to the export progress screen, where you can monitor completion status and file size in real time. Once finished, the exported JSON file is ready for download. In a typical example, 42 posts export to a file around 1 MB – the exact size depends on content length and the number of posts.
Step 2: Export Posts Individually (Selective Export)
When you need to export specific posts rather than your entire library, use the Export Individually option found under Advanced Options in the Posts section. Once selected, the plugin loads your available posts based on the configured Export List Size. You can select individual posts using checkboxes, use the Select All toggle to select or deselect everything at once, and then export only the chosen items. This is especially useful for migrating a subset of your content – for example, exporting only your product documentation pages or a specific author’s posts.
Step 3: Export Posts by Date Range
The Export by Date Range option filters your posts to a specific publish window. Select this option and fill in the From and To date fields. The plugin instantly updates the post list to show only posts published within that range – along with their exact publish dates for verification. When you click Export, only those filtered posts are included in the output JSON file. This is ideal for archiving older content, exporting seasonal campaigns, or migrating only recent posts to a new site.
Step 4: Export ACF Custom Fields
By default, exported JSON files do not include ACF custom meta fields. To include them, enable the Export Custom ACF Fields option before running the export. Make sure the Advanced Custom Fields (ACF) plugin is installed and activated on your source site. Once enabled, all ACF field data attached to the exported posts is bundled into the JSON file and will be available during import.
Step 5: Enable WPML / Polylang Multilingual Export
For multilingual WordPress sites, the plugin supports both WPML and Polylang. If either plugin is active on your site, the WPML Multilingual Language Support option becomes available. Enable it before exporting, and the plugin will include all language-specific post data for every translated version of your posts. This ensures a complete, lossless migration for multilingual content without requiring manual reassignment of translations after import.
Step 6: Import Posts from a JSON File
Importing is equally straightforward. In the Import section, click the file selection field and choose your previously exported JSON file from your computer. Once selected, click Start Import. The plugin processes all posts inside the file and imports them into your WordPress installation. For greater control, enable the Import Individually option under Mode Options – this loads all posts from the JSON file and lets you cherry-pick exactly which ones to import, rather than importing everything at once.
Batch Processing Configuration Options
Depending on your server environment, standard single-pass processing may time out on large sites. The plugin’s Batch Processing system breaks exports and imports into manageable chunks, preventing server overload. You can access these settings in the Batch Settings section of the plugin page.
| Setting | What It Controls | Default | Recommended |
|---|---|---|---|
| Batch Processing | Enables or disables chunked processing | Enabled | Keep enabled for most servers |
| Server Preset | Pre-configures all batch values to match server tier (Micro / Light / Standard / Balanced / Max) | Standard | Match to your actual hosting plan |
| Post Batch Size | Number of posts processed per batch | 10 | 10–50 depending on server |
| Page Batch Size | Number of pages processed per batch | 10 | 10–50 depending on server |
| Concurrent Requests | How many parallel requests run simultaneously | 1 | 1–3 for shared hosting; up to 5 for VPS |
| Media File Batch Size | Number of media files processed per batch | 10 | 5–20 depending on file sizes |
| Media ZIP Size | Maximum size (MB) per exported ZIP file – splits automatically beyond this limit | 20 MB | 20–50 MB |
| Batch Delay | Millisecond pause between batches to prevent throttling | 500 ms | 0–100 ms for powerful servers; 500–1000 ms for shared hosting |
| Export JSON File Size | Maximum number of posts per exported JSON file – splits into multiple files if exceeded | 2000 | 500–2000 depending on post complexity |
| Export List Size | How many posts appear at once in Individual Export mode | 300 | 100–300; lower for large sites |
Server Preset quick guide: Use Micro for budget shared hosting (e.g., entry-level cPanel plans). Use Light or Standard for mid-tier shared or managed hosting. Use Balanced or Max for VPS, dedicated servers, or cloud instances with high CPU and memory.
Understanding Export List Size and Load Next Pagination
The Export List Size setting directly controls how the Individual Export list behaves on large sites. If you set it to 100 and you have 42 posts, all 42 appear at once. If you have 350 posts and the limit is 100, only the first 100 load initially. Click Load Next to fetch the following 100, and repeat until you’ve viewed all available posts. This pagination system prevents browser timeouts and PHP memory exhaustion that would occur if thousands of posts were loaded simultaneously. For sites with more than 1,000 posts, set Export List Size to 50–100 and use multiple Load Next cycles to review and select content efficiently.
Best Practices for WordPress Post Export Import
- Always export media before posts: The plugin keeps media and post data separate for flexibility. Export your media library first, then export your posts. This ensures all media references in your post content are resolvable on the destination site. If you skip the media export, use the plugin’s direct download option to pull media from the source URL during import – but this requires the source site to remain publicly accessible.
- Test on a staging environment first: Before running a WordPress post export import on a live production site, test the full workflow on a staging clone. Verify post counts, media attachment resolution, ACF field values, and URL structures before touching the live destination.
- Match server presets to your actual hosting tier: Using the Max preset on shared hosting will cause timeouts and failed exports. Use the System Test panel to review your server’s PHP memory limit, max execution time, and upload size limit before choosing a preset.
- Use date range export for incremental migrations: If you’re running a phased migration, use the date range filter to export posts in batches by publish date. This avoids re-importing content that was already migrated in a previous session.
- Enable ACF export only when ACF is active on both sites: The ACF custom field export requires the ACF plugin to be installed and active on both the source and destination site. If ACF is missing on the destination, the field data will be included in the JSON but cannot be properly mapped during import.
- Lower the Batch Delay for faster exports on powerful servers: If your server has dedicated CPU resources and no rate-limiting, set Batch Delay to 0–100 ms. This dramatically speeds up large exports without risking throttling errors.
- Keep exported JSON files organized by date: When exporting in segments (e.g., using Export JSON File Size = 500 on a 2,000-post site), the plugin creates multiple JSON files. Label and store them systematically so you can import them in the correct order on the destination site.
Developer Notes
The following notes are intended for developers extending or integrating with the WordPress post export import functionality of this plugin.
- JSON export format: Exported files are standard JSON, making them parseable by any external script or migration tool that needs to pre-process content before import.
- Batch system architecture: The batch processing engine uses a configurable loop that can be tuned through the admin settings panel. It is designed to work within PHP’s
max_execution_timeandmemory_limitconstraints visible in the System Test panel. - ACF field integration: When ACF export is enabled, the plugin reads field group and field key mappings from ACF’s internal API. Ensure field group keys are consistent between source and destination sites for clean remapping.
- WPML/Polylang integration: Language metadata is pulled from the respective plugin’s database tables when the multilingual option is active. The plugin stores language codes and translation relationships in the export JSON for reconstruction on import.
// Example: Checking system readiness before triggering export
// The plugin surfaces these values in the System Test panel
$php_memory   = ini_get('memory_limit');       // Should be 256M or higher
$max_exec     = ini_get('max_execution_time'); // Should be 120s or higher
$upload_size  = ini_get('upload_max_filesize'); // For import file size limits
// Use these values to choose the right Server Preset:
// memory_limit < 128M  → Micro preset
// memory_limit 128–256M → Light or Standard preset
// memory_limit 256M+  → Balanced or Max preset
How Post Export Import with Media Compares to Alternatives
When evaluating tools for WordPress post export import, several plugins exist in this space. Here is an honest comparison:
| Plugin | Export Format | Media Handling | ACF Support | Batch Processing | Multilingual |
|---|---|---|---|---|---|
| Post Export Import with Media | JSON (structured) | Dedicated media export + direct download option | ✅ Built-in toggle | ✅ Full server presets + custom config | ✅ WPML + Polylang |
| WP All Export | CSV / XML | Limited - URLs only | ✅ Via add-on (paid) | ✅ (Pro only) | ⚠️ Partial |
| WP All Import | XML / CSV import only | URL-based attachment download | ✅ Via add-on (paid) | ✅ (Pro) | ⚠️ Via add-on |
| WordPress Native Export | WXR/XML | ⚠️ No physical file export | ❌ Not supported | ❌ None | ❌ None |
Choose Post Export Import with Media when: you want a single plugin to handle both post and media migration with batch processing controls, need ACF and multilingual support without paid add-ons, or prefer a JSON-based workflow over CSV/XML for cleaner data integrity.
Frequently Asked Questions
Does the WordPress post export import feature support custom post types?
Yes. The plugin supports standard posts, pages, and custom post types registered on your WordPress site. When you open the Post Export section, custom post types registered via register_post_type() are listed alongside standard content types. Select the appropriate type before running your export to include those items in the JSON output.
What happens if the export is interrupted partway through?
If Batch Processing is enabled, an interruption only affects the batch currently in progress. The export progress screen shows you where processing stopped. You can restart the export, and the plugin will resume from the next unprocessed batch. For very large sites on low-powered servers, increasing the Batch Delay setting reduces the chance of interruptions caused by server throttling.
Can I import only selected posts from a JSON file?
Yes. Enable the Import Individually option in the Mode Options section before starting an import. The plugin will load all posts found in the JSON file and display them as a selectable list. Choose the specific posts you want to import and ignore the rest. This is particularly useful when importing from a large export file that contains more content than you need on the destination site.
How does the Media ZIP Size setting affect my export?
When exporting media files alongside posts, the plugin packages media into ZIP archives. The Media ZIP Size setting (default 20 MB) defines the maximum size of each ZIP file. If your total media exceeds that limit, the plugin automatically splits the export into multiple ZIP files - for example, a 60 MB media library would produce three 20 MB ZIP files. This prevents browser download timeouts and keeps individual files manageable for upload to the destination server.
Is it safe to export posts on a live production site?
Yes. The export process is read-only - it reads post data from the database and packages it into a file without modifying any content. Your live site is not affected during export. However, best practice is to run large exports during low-traffic periods, especially on shared hosting where batch processing jobs compete with live visitor requests for PHP resources.
What should I do if the export progress bar stops moving?
A stalled progress bar usually indicates a server timeout or memory limit hit. Open the System Test panel and check your PHP max_execution_time and memory_limit values. Then go to Batch Settings and lower the Post Batch Size and increase the Batch Delay. Switch the Server Preset to a lower tier (e.g., from Standard to Light). These changes reduce load per batch and give the server enough time to complete each chunk before the next begins.
Conclusion
The WordPress post export import system in Post Export Import with Media gives you precise, server-aware control over every aspect of content migration. From one-click bulk exports to date-filtered selective exports, ACF custom field handling, WPML multilingual support, and a fully configurable batch engine - this plugin covers the complete migration workflow in a single admin page. Start with the System Test panel to understand your server's limits, choose the right Server Preset, handle media first, and then run your post export. For next steps, see our Media Export & Import guide and our Batch Settings configuration reference


Leave a Comment
Your email address will not be published. Required fields are marked *