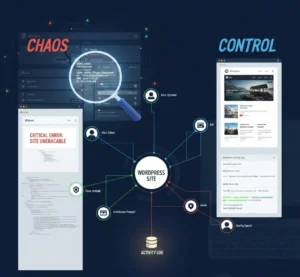
- Overview
- Step 1: Install and Activate the Plugin
- Step 2: Export Media from Source Website
- Step 3: Export Posts from Main Website
- Step 4: Import Media into the New Website
- Step 5: Import Posts Using JSON File
- Import Options Explained
- Recommended Settings (Best Practice)
- Alternative Setup (Without Media Export)
- Import Individually (Selective Import)
- Performance Tips
- Troubleshooting
- Conclusion
- Need Help?
Table of Contents #
Learn how to import posts with images in WordPress using JSON files and proper media handling.
This guide will help you migrate your website content while keeping images, dates, and structure intact.
Overview #
This plugin allows you to:
- Import posts using a JSON file
- Keep original publish dates (SEO-friendly)
- Map images automatically from Media Library
- Download missing images from source URLs
- Import all posts or select specific ones
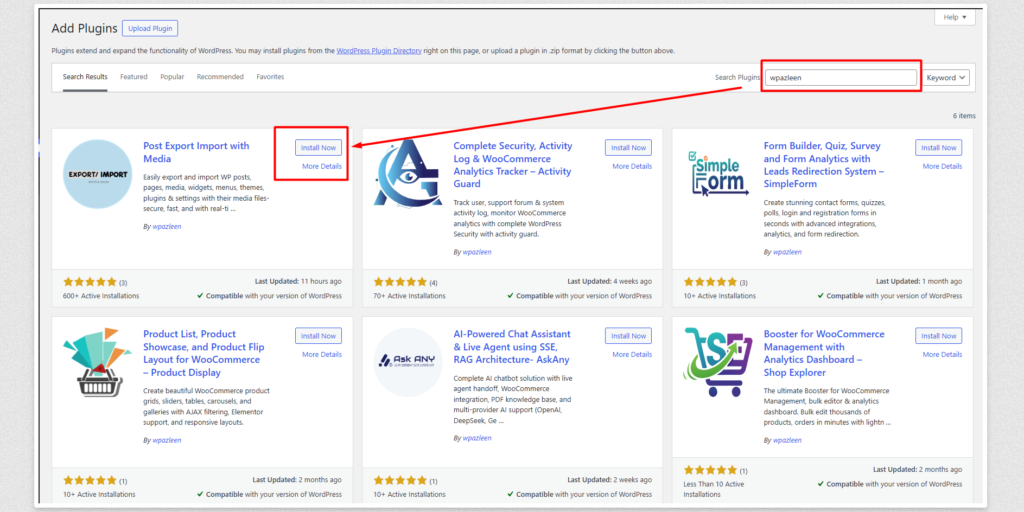
Step 1: Install and Activate the Plugin #
Go to your WordPress dashboard and install the plugin:
- Navigate to Plugins → Add New
- Upload the plugin ZIP file or search for it “wpazleen” and Install the “Post Export Import with Media“
- Click Install Now
- Click Activate
Step 2: Export Media from Source Website #
Before importing posts, export all media files from your main website.
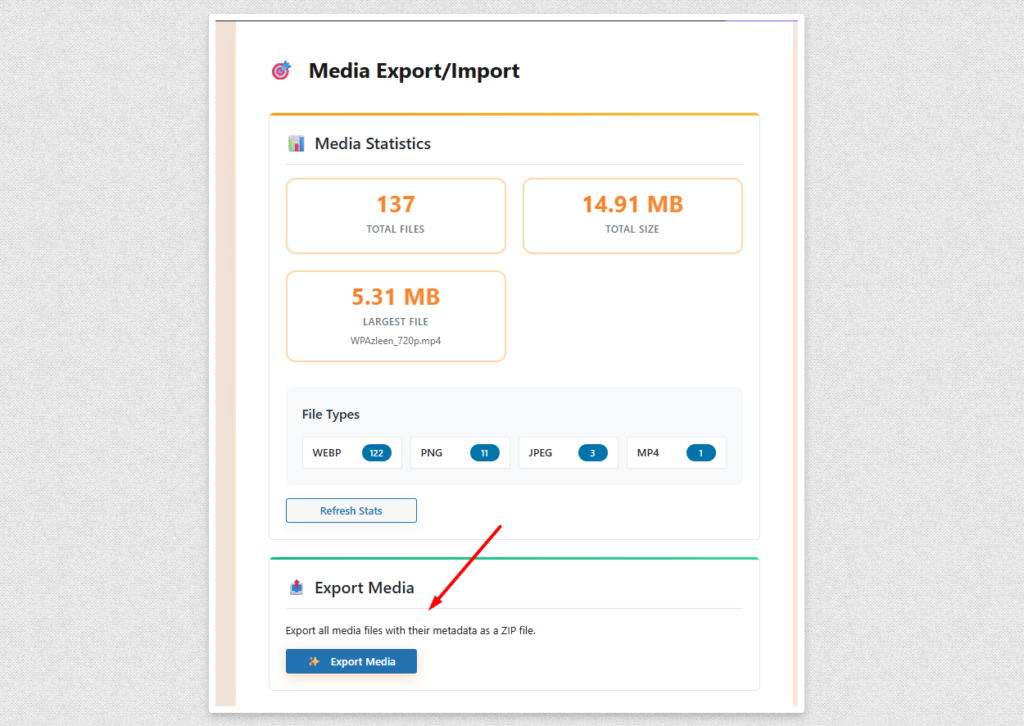
Use the Media Export/Import feature to:
- Export all images and media files
- Download the ZIP file
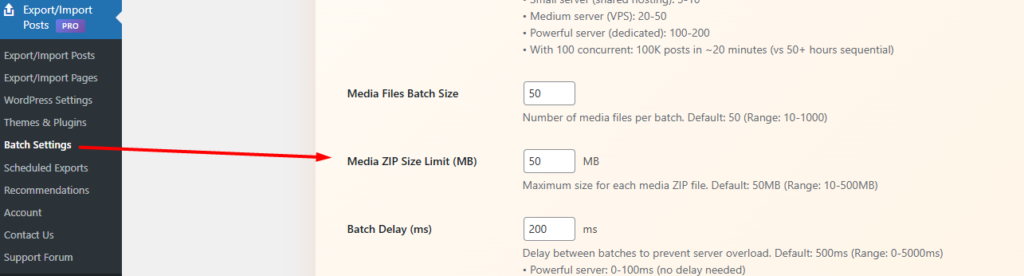
If you enable the batch processing setting and set the media ZIP size limit to 10 MB, but your total media size is 100 MB, the system will split the files into multiple ZIP archives. You will then need to import those ZIP files one by one into the new site.
You can get an estimate of your total media size from the media statistics section. Based on that, you can increase the “Media ZIP Size Limit (MB)” accordingly so the media can be exported as a single ZIP file instead of multiple ones.
This step ensures your images are available in the new website.
Step 3: Export Posts from Main Website #
Go to Posts Export/Import section in your main website. Click on Export Post to download your posts as a JSON file.
Export Individually (Optional) #
If you enable “Export individually (select specific posts)”:
- You will see a list of all available posts
- You can select all posts or choose specific ones
- Click Export Post to download selected posts only
This is useful if you don’t want to export the entire site content. Once the export is complete, a JSON file will be generated and available for download.
Step 4: Import Media into the New Website #
Make sure the”Post Export Import with Media” plugin is installed and activated on your new website. Now upload the exported media into your new website:
- Go to Media Export/Import → Import
- Upload the media ZIP file
- Complete the import process
Once done, all images will be available in your Media Library.
Step 5: Import Posts Using JSON File #
Now you can import your posts:
- Go to the plugin import section
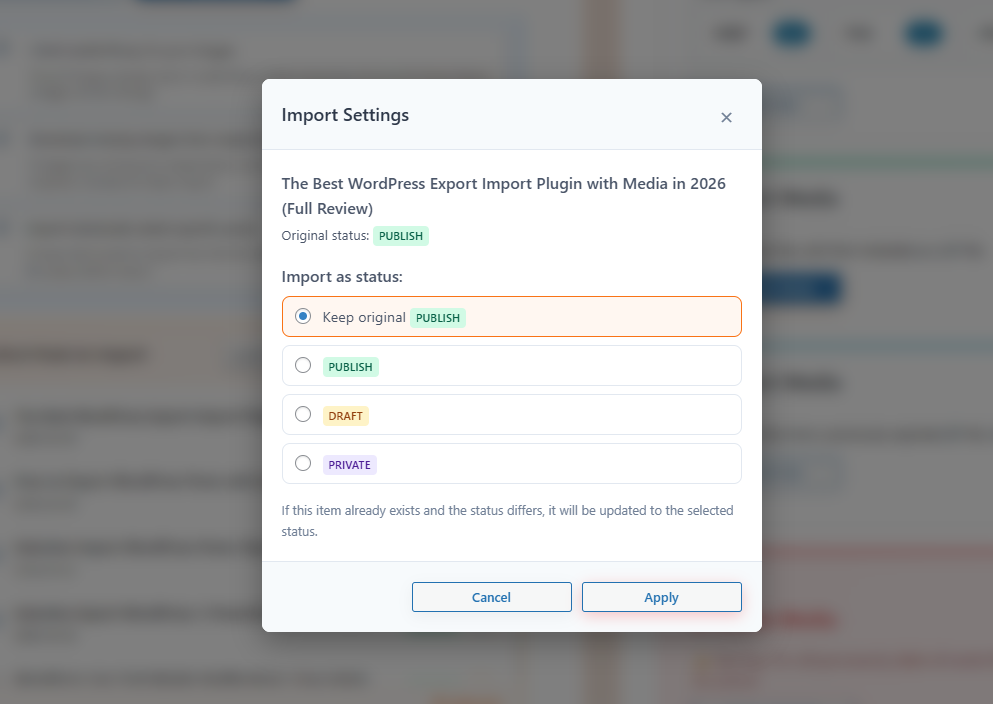
- Select your JSON file and check the import settings before click ” Start Import”
- Choose import settings
- Check media library for post images
- Check second option “Download missing images from original URLs” If you want to download missing images from original URLs
- The “Import Individually (Select Specific Posts)” option allows you to import selected posts one by one, and also gives you the flexibility to change the post status during the import process.
- Click Start Import
Important: The import date does not matter. All posts will keep their original publish date.

Import Options Explained #
1. Check Media Library for Post Images #
This option checks if images already exist in your Media Library before importing.
- If enabled: Existing images will be reused (no duplicates)
- If disabled: Import will be faster, but images may be missing
Use this option when: You have already imported media into your new site.
2. Download Missing Images from Original URLs #
This option downloads images from the original website if they are not found in the Media Library.
- Works together with the first option
- Automatically fetches missing images
Use this option when: You did not import media beforehand.
Recommended Settings (Best Practice) #
If you already imported media:
- ✔ Enable: Check media library for post images
- ❌ Disable: Download missing images
This gives you faster import and clean media mapping.
Alternative Setup (Without Media Export) #
If you skipped exporting media:
- ✔ Enable both options
This ensures all images are downloaded automatically, but may take more time.
Import Individually (Selective Import) #
You can also import specific posts instead of all:
- Select only the posts you want
- Change post status before import (Draft / Published)
- Manually review content before importing
Best for: Testing, partial migration, or controlled publishing.
Performance Tips #
- Already imported media → Enable media check only
- No media imported → Enable both options
- Need speed → Disable both (images may be missing)
Troubleshooting #
Images missing?
Enable “Download missing images from original URLs”
Import is slow?
Disable download option if media already exists
Duplicate images?
Enable “Check media library for post images”
Conclusion #
For the best results, always export and import media first, then import posts.
This ensures:
- Faster import process
- No missing images
- Accurate content migration
Need Help? #
If you need assistance, feel free to contact our support team.
— WPAzleen Team


Leave a Comment
Your email address will not be published. Required fields are marked *